by David J. Watkins
Beginning Astrophotography - Wide Angle Images
1) Astrophotography 101 2) Wide Angle 3) The Moon 4) Large Nebula 5) DSO's 6) Planets 7) The Sun
Focus:
Before I discuss equipment, I want to bring up the topic of focusing. Focusing is one of the most important and time consuming tasks in astrophotography. In astrophotography, perfect focus an aboslute necessity.
You will want to focus at infinity to get sharp pin point stars. In the old days with manual focus lenses, you could just rack the focus to the infinity setting. With today's autofocus lenses, they will turn past infinity. That doesn't sound possible does it? The reason for this is so that the motors in the lens do not slam against a hard stop when autofocusing. When focusing for astrophotography, you will want to switch your lens to manual focus. Autofocus just does not work in the dark or on tiny objects or very faint objects. You cannot autofocus on a star! The only sky object you can focus on at night is the moon, so you need to get used to focusing manually. Focusing on stars is like learning a new skill. There are focusing aids available for astronomy, mostly for telescopes.
The method of focus that I use is the live view mode on the camera. You will need to find a bright star to begin. If you are using a wide angle lens then you will probably not be able to use a star to focus, you may have to find a light or lit source way off in the distance to focus on. You will also want to set the ISO on the camera to its highest setting possible (ISO 6400, 12800, or 25600). Then set the mode to bulb mode or the "B" setting on the camera. Zoom in on the star at 5x or 10x in live view mode if your camera has that feature. Then rack the focus back and forth until the star is the smallest pin point that you can get. The star will swell in size the more out of focus that you are. Once the star is the smallest size that you can get it, you are in focus. As long as you do not disturb the focus, you should not have to re-focus to shoot other stars. All stars, galaxies, planets, nebula, etc are at infinity as far as the lens is concerned. Unlike focusing on a subject in the daylight, focusing on a star can take a very long time, so don't be surprised if you spend 15 minutes or more achiveing focus! One way to cheat this process is to use the moon to focus on if it is out. Most likley you will be shooting stars or the Milkyway when there is no moon to take advantage of the dark sky, so don't count on the moon to be able to focus on.
Equipment for Wide Angle Images:
Most wide angle astro images like the Milkyway and star trails are shot using a tripod, camera, and lens. You will find a DSLR is much easier to work with than a point and shoot camera. A DSLR will allow you much more control over the settings. Full Manual mode works the best for astrophotography. You want to have complete control over the shutter speed, apeture, ISO, and focus. If the camera automatically sets the shutter speed you will likely end up with blurred stars. The camera will not be able to auto focus on a star. Most point and shoot cameras are difficult to operate in full manual mode. A telescope is not very useful for wide angle images. It has too narrow of a field of view. A telescope is used to zoom in on the sky and not view it from a wide angle or wide field of view.
A remote shutter or timer release is another useful piece of hardware. I highly recommend getting a timer instead of just the shutter release. The max shutter speed on most cameras is 30 seconds. A remote timer allows you to take exposures longer than 30 seconds. The Canon TC80N3 is the remote timer that I use with my 5DMarkII, it costs about $130. There are many remote timers available for all the different camera bodies. You can get remote shutter releases for under $10 but without the timer function, you will have manually time and release the shutter. Don't rely on looking at a watch to do this. You will quickly realize that constantly looking at your watch in the dark is a problem.
For wide angle shots or star trails, a tripod is all that is needed. There is no need for a tracking mount, unless you want a very long exposure of the Milkyway against the sky only. And even then you can still shoot on a tripod using shorter multiple exposures and adding or stacking them with software to obtain a single long exposure. Tracking mounts and stacking images are discussed in detail in the Aquiring Astro Images and Astro Image Processing sections.
Stars And The Milkyway Band:
For imaging stars or the band of the Milkyway, you will not want your stars to "trail" or elongate. A good way to determine how long you can expose, with the camera on a tripod, before the stars begin to elongate is to use the Rule of 600.
The rule of 600 is: [600 / focal length of lens(mm) = max seconds without elongation]. So if you have a 600mm lens, you can shoot for 1 second before stars will begin to elongate! Likewise at 50mm you can expose for 12 seconds before the stars will elongate. The chart below gives you an idea of how long the exposure can be for the focal length of the lens.
- 600mm lens = 1 second exposure without stars trailing
- 300mm lens = 2 second exposure without stars trailing
- 200mm lens = 3 second exposure without stars trailing
- 100mm lens = 6 second exposure without stars trailing
- 50mm lens = 12 second exposure without stars trailing
- 20mm lens = 30 second exposure without stars trailing
- 10mm lens = 60 second exposure without stars trailing
Being able to set the exposure manually is why a DSLR is better than a point and shoot camera. Most point and shoot cameras operate in full auto mode and may lengthen the exposure time to obtain the image. If your point and shoot has a shutter priority mode you can set the desired shutter speed and the camera should adjust the aperture and ISO to get the proper exposure.
When imaging the night sky and using a lens, you typically open the lens to it's widest aperture or close to it. Being able to manually set the aperture is another reason that a DSLR is better than a point and shoot camera for astrophotography. You will typically want to shoot the Milkyway when there is no moon in the sky. This will allow you to capture the most detail in the sky. The moon is quite bright and will wash out the sky losing all the detail of the Milkyway core. The only downside to shooting with no moon is that any foreground objects will be completely dark.
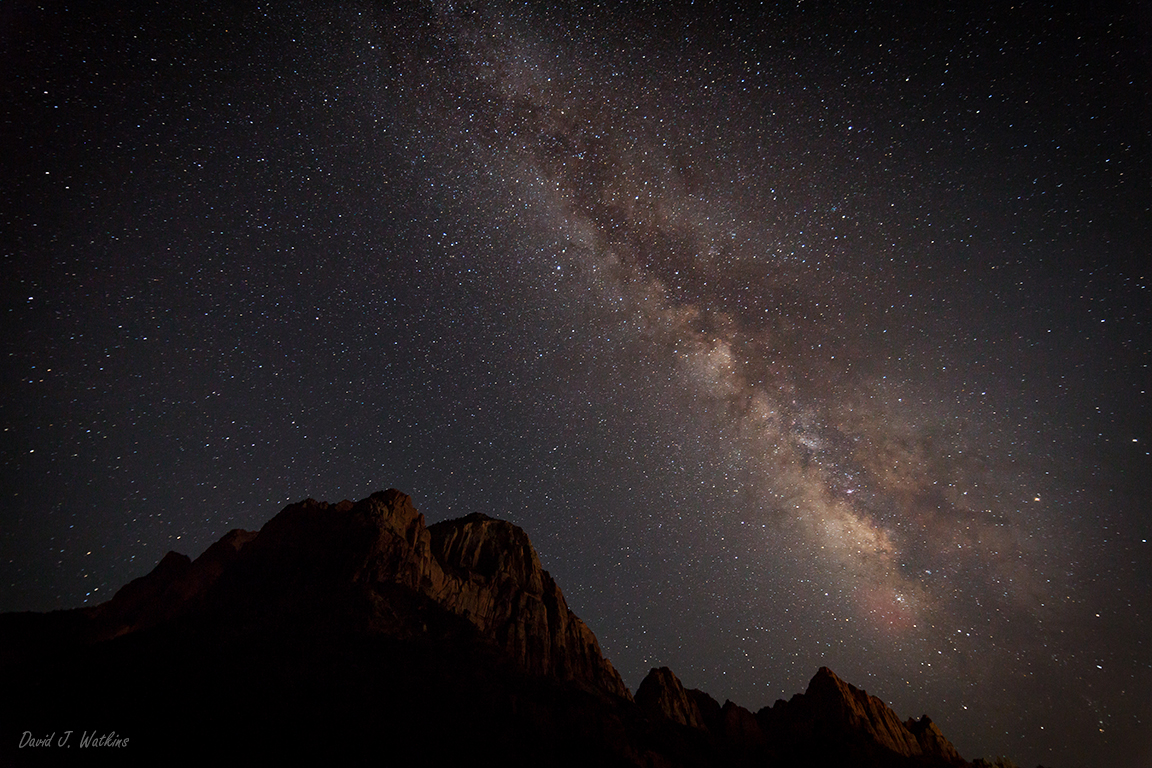
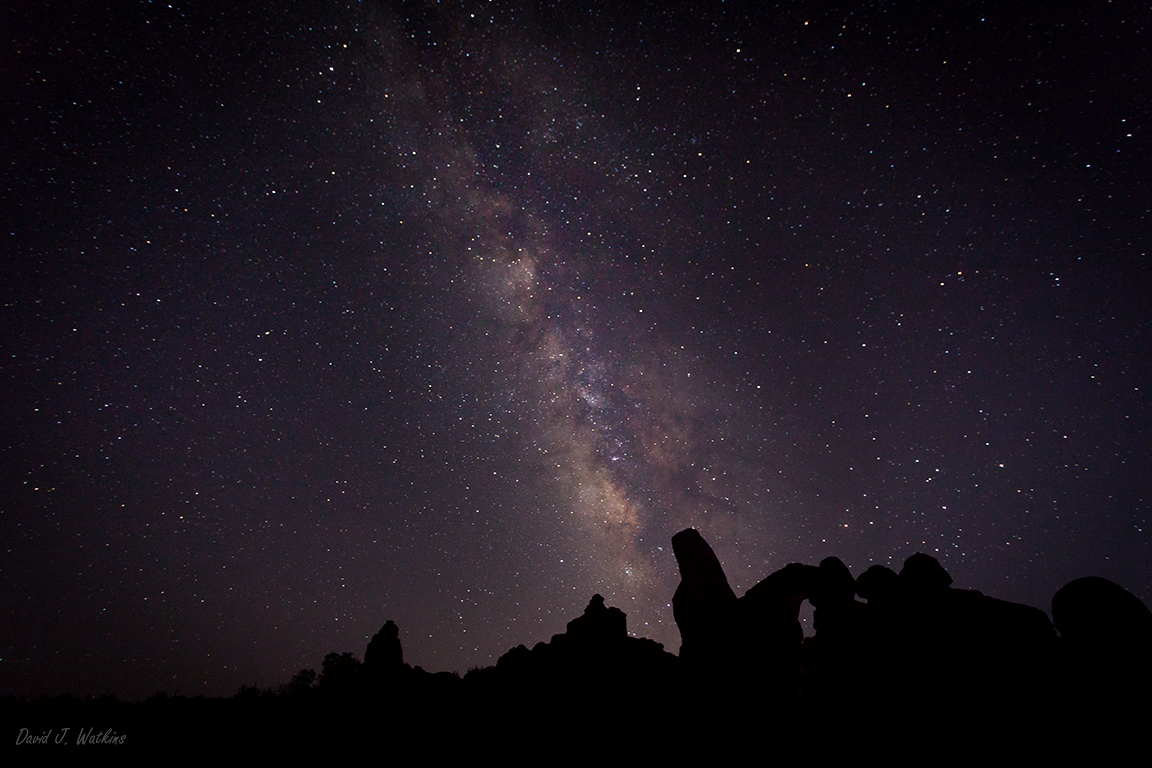
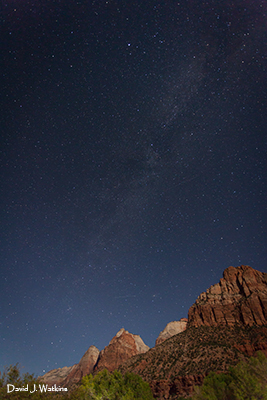
The less light pollution, the better. The image above was taken at Arches National Park, just a few miles from Moab, Utah. Moab has a lot of lights and while not anywhere near the size of a large city, it is close enough to the park to affect the night sky. The image on the right was taken in Zion National Park, also in Utah. The town of Springdale is just outside the park, but it is nowhere near the size of Moab. The canyon walls of Zion canyon also help to block out any light on the horizon. On the night I shot the image to the right, there was a quarter moon, it was well to the west and setting behind the canyon walls, so it did not affect the sky too much. But there was enough light to just illuminate the tops of the Watchman and the other peak of the eastern canyon wall. Taken with my Rokinon 14mm lens, f/2.8, ISO1600, and a 30 second exposure.
You also want to shoot at the lowest possible ISO that you can. Since your aperture is wide open, it becomes a balancing act between shutter speed and ISO to get your proper exposure. Too slow a shutter speed and your stars will begin to trail, and too high an ISO and your shot will be full of noise. While experimenting, I shot this image at ISO 12800 for 15 seconds. You can clearly see that this image is extremely noisy! A better choice would have been ISO6400 for 30 seconds, according to the chart above my 17mm lens would still yield round stars with a 30 second exposure. ISO6400 still produces a lot of noise even on the best cameras, so some post processing noise reduction would be required.
Milkyway and star images are often more interesting when shot against foreground subjects like trees, rock formations, or over water. Be creative and experiment, one popular effect is to illuminate the foreground subject with a flashlight. Since your exposure is long, a quick pass over of the foreground object with a flashlight will bring that object out of the darkness. Use the flashlight like a paintbrush and "paint" your foreground subject with the light. Here, I used a small LED style flashlight to "paint" the Organ rock formation with light at Arches National Park, Utah. Remember if you are including foreground subjects you may have to stop down your aperture to increase your depth of field and re-focus so that both your foreground and sky are in focus.
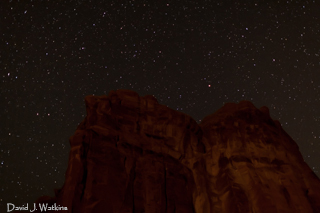
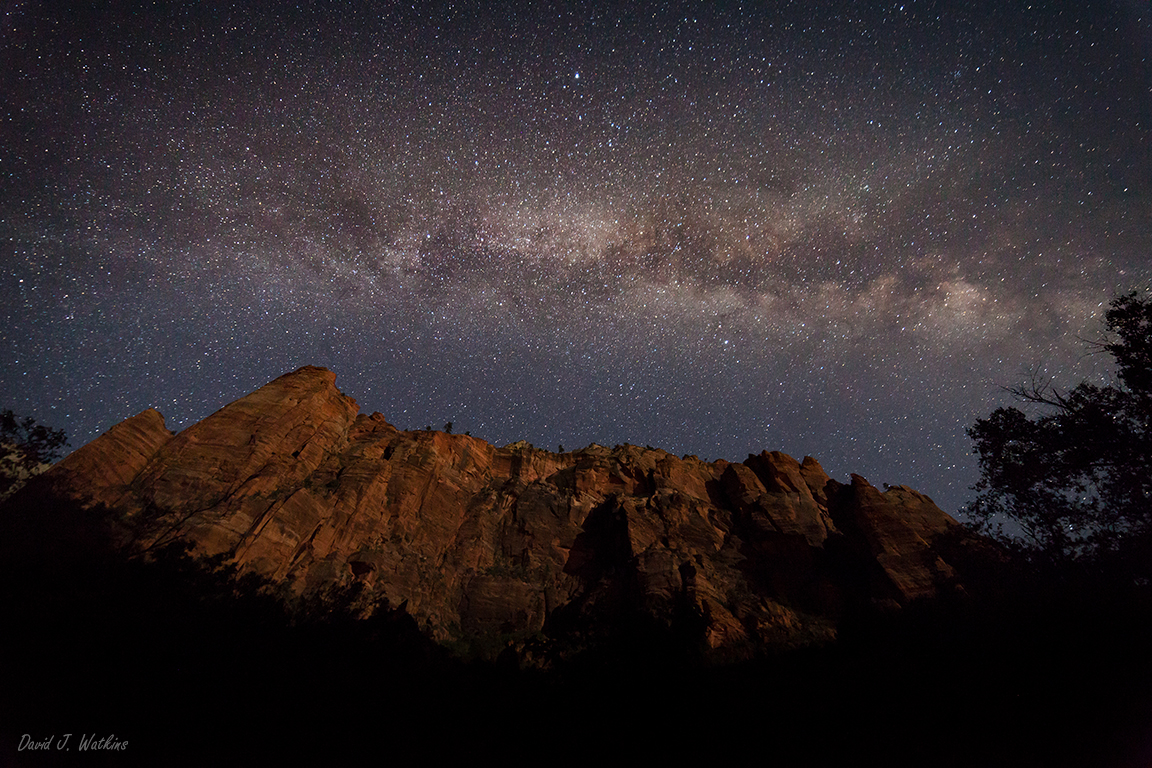
Always be ready to adapt to the conditions. When I shot this image, the moon was more than half full so my thought was that it would wash out the milkyway and the sky would not be dark. The opportunity that opened up was that the moon illuminated the canyon walls while the milkyway was still visible. On a moonless night the milkyway would be more intense but the canyon walls would be dark. And there would be no way to illuminate these canyon walls with a flashlight. Canon 5DMarkII 17-40mm lens at 17mm, ISO 3200, exposure of 25 seconds at f/4.
For this image, taken in Zion Canyon, I walked on a trail north of the lodge toward the Grotto picnic area. There was a quarter moon far enough to the west to be blocked by the canyon wall, but it was still high enough to illuminate the entire eastern wall. This image was taken with my Rokinon 14mm lens at f/2.8, ISO3200, and a 30 second exposure.
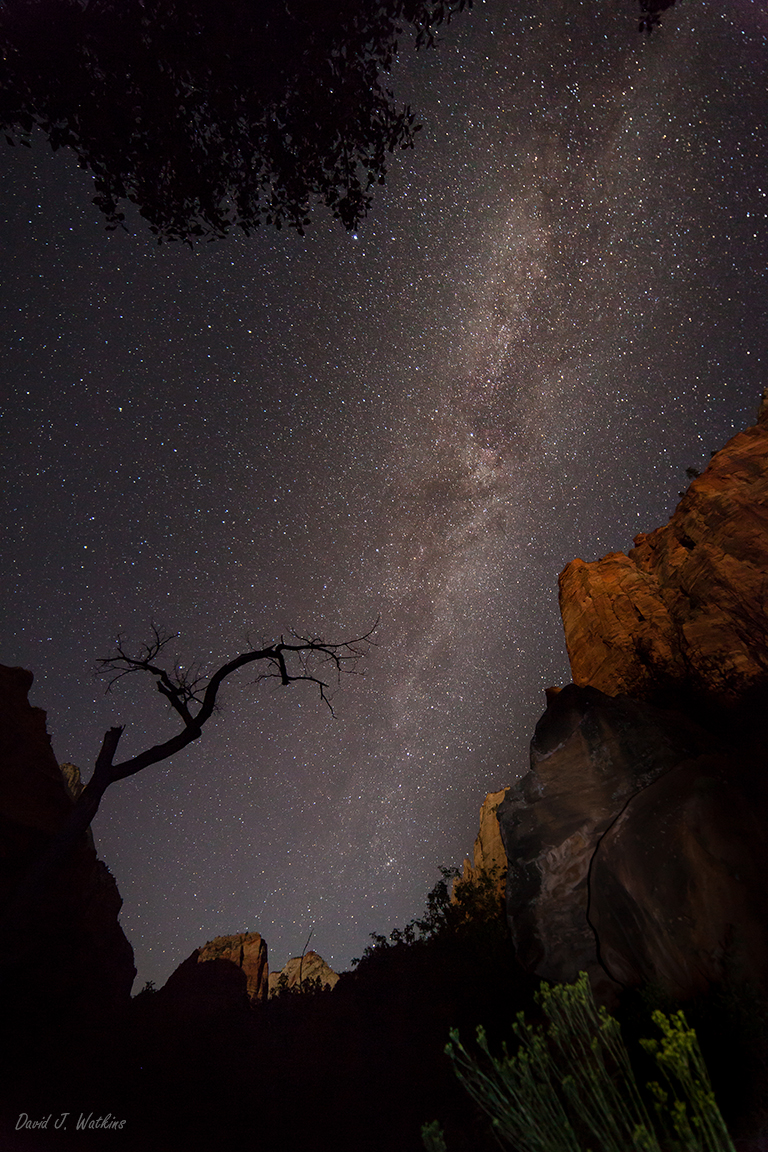
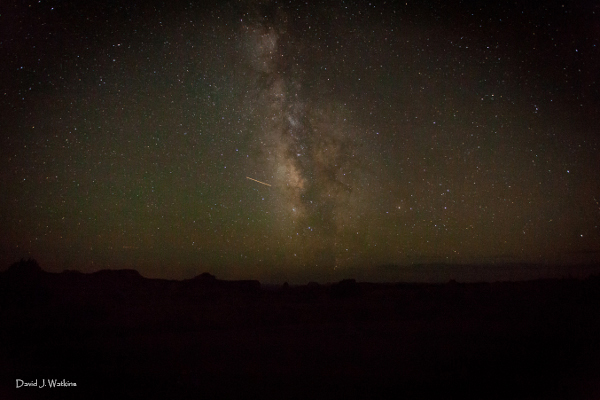
Most images of the Milkyway are shot facing south, but in a dark sky location, the Milkyway can stand out to the north as well. This image was taken with my Rokinon 14mm lens at f/2.8, ISO3200, and a 30 second exposure.
Stacking:
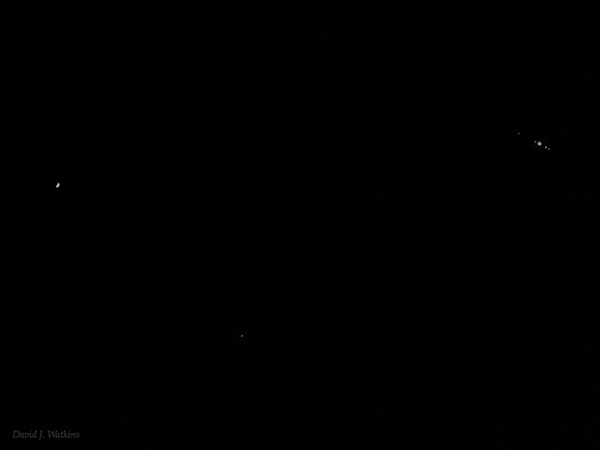
Another technique for imaging is stacking images. To the left is an image of the conjunction of Jupiter and Venus from July 25, 2015. This image is a composite of 3 separate images that were combined for the three different exposures required. Venus is extremely bright, but the moons of Jupiter are dim. The moons of Jupiter were exposed at ISO1600 1/5 sec at f/8. Jupiter was exposed at ISO400 1/125 sec at f/8 and seven images were stacked just for Jupiter to bring out the detail of the atmospheric bands for the high resolution image. Venus was exposed at ISO100 1/125 sec at f/8 and a single image was used. The images were combined in Photoshop to get this final composite. The star at the bottom center is HIP47266. The lens used was a Canon 600mm with a 2x extender for a total of 1200mm. A tripod was used so there was no tracking. As the planets moved, they had to be reframed for each exposure.
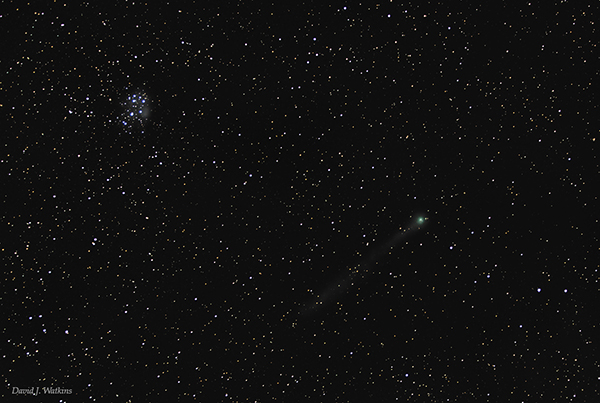
This image of Comet Lovejoy (C/2014 Q2) from January 2015, consists of 245 five second images. It was stacked using PixInsight software. It was shot in a residential neighborhood with excessive light pollution from north eastern Ohio. Shot with a Canon 5DMarkII and a 70-200mm lens at 70mm.
Star Trails:
Shooting star trails is not much different than shooting static star images or Milkyway images. The only difference is that you want the stars to trail, so you will use extremely long exposures.
Just like for static wide angle images, you should try to open the lens to it's widest aperture or close to it. The length of the exposure you will use depends on how long of a trail you want in your image. You should plan on exposing for at the very least an hour. Most star trail images are exposed between 1 and 3 hours.
Most digital sensors will overexpose or blow out the image with exposures over several minutes. There are software packages available that allow you to capture multiple shorter exposures of a few seconds to a couple of minutes, then add or stack them together to create a long exposure. For example you can capture a total of 90 two minute images and use software to create one three hour exposure. One thing to remember when imaging that way is that the stars continue to move between your exposures (the time after the first exposure before you start the next, as in the time your camera is not imaging), so if you wait more than several seconds to start the next exposure, you will have a gap in your star trail! Some software will compensate for that gap and fill it in.
Most star trail images are shot facing north. The stars in the north will rotate about the celestial north pole. This will give the appearance of concentric circles rather than large arcs across the sky.
Star trail images tend to be more interesting when shot against a foreground object like a tree or rock formation. Just like static star images, you should be creative and try illuminating your foreground object with a flashlight.

For this image, I set my Canon 5DMarkII on a tripod with a Rokinon 14mm lens set at f/4, ISO 50, and 120 second exposures. I used my Intervalometer to expose 30 consecutive images. I allowed only 3 seconds between exposures so I did not have any gaps in my trails. This image was obviously shot facing north. I had to stop the lens down to f/4 and ISO to 50 because the light pollution from Cleveland was blowing out the image above the tree line. This is my first star trails image. Finally, after nearly four years, I gave it a try. I had always worried that it would take time away from imaging DSO's, but it wasn't that bad. It only took a few minutes to set up and figure out what settings I needed for the image, then I just let the camera go while I was also imaging NGC6543 (Cats Eye Nebula) with the telescope.
The one problem with star trail images is that you will likely have to deal with removing planes from your images unless you are extremely lucky! Surprisingly I had only one plane fly through my image and it wasn't that difficult to remove with Photoshop. But the two small clouds that passed through the image were not so easy to remove! You can see them in the image as two streaks that almost look like contrails.
Once you have collected all your images, you will need software to stack them. You can do it in Photoshop, but there are many software packages specifically tailored to stacking star trail images. I used PixInsight, the same program that I use to stack my DSO images. Though for star trails, the settings must be changed a bit. PixInsight is great at removing anomalies between images. And since every star was in a different location between images, PixInsight removed ALL of the stars! So I ended up with a pristine sky! I had to go back and change the settings as to not remove any "outliers". I don't have any recommendations on what software packages to use for star trails but a quick search on the internet will bring up several.
Review Of Recommended Equipment:
- Sturdy Tripod
- GEM Tracking mount - only if you want long exposure images of Milkyway band in the sky only.
- Any wide angle lens from a fisheye lens to 50mm lens
- DSLR camera with low noise at high ISO.
- Software for stacking star trail images.
- A Telescope is NOT recommended for wide angle images.
Equipment you might be able to get away with:
- Point and shoot camera
1) Astrophotography 101 2) Wide Angle 3) The Moon 4) Large Nebula 5) DSO's 6) Planets 7) The Sun